
Here it is! The much-anticipated cake blog! This cake, like some of my cooking, was something I just made up. So, again, I learned as I was going and some of my pictures don't quite match my directions. And while it looks difficult, it really isn't. Time consuming? Yes. Difficult? No. If you can roll and cut out Play-dough, you can make this cake.
One great thing about this cake is that it can be made in stages and spread out over a week. Here are the things you will need to make this cake.
- 1 recipe Marshmallow fondant (See below)
- 9 cups of butter cream frosting
- 6 cake mixes
- 11x15 cake pan
- 6 inch round cake pan
- 20x20 inch cardboard, wrapped in foil
- Blue, green and black frosting coloring gel
- 1 tub piping gel
- 1 graham cracker square
- Decorating tip 233 (grass)
- Ruler
- Fondant mat or 1 inch grid on printer paper under wax paper
- Rolling pin
- Kitchen skewers
- Toothpicks
- Pizza cutter (optional)
- frosting spreader
I have never been a big fan of fondant. Yeah, its neat and pretty looking, but it tastes like crap. Most people, including myself, just peel the fondant off to get to the butter cream frosting underneath. And who wants to to all that work for no one to even eat it? Not me. But I was willing to use it just for the stone work on the castle purely for the smooth look of the stone. So you can imagine how happy I was when a friend told me about Marshmallow Fondant! (Thanks Janna!) Not only is the recipe cheap and easy, it tastes fantastic! So much so, that I had to stop myself from eating it so I would have enough. Here is Janna's recipe:
Marshmallow Fondant
- 16 ounces white mini-marshmallows (use a good quality brand)
- 2 to 5 tablespoons water
- 2 pounds powdered sugar
- 1/2 cup shortening (you will be digging into it so place in a very easily accessed bowl)
NOTE: Please be careful, this first stage can get hot. Melt marshmallows and 2 tablespoons of water in a microwave bowl. Put the bowl in the microwave for 30 seconds, open microwave and stir, back in microwave for 30 seconds more, open microwave and stir again, and continue doing this until melted. It usually takes about 2 1/2 minutes total. Place 3/4 of the powdered sugar on the top of the melted marshmallow mix and gently stir a few times with a well-greased, rubber spatula. Now grease your hands GENEROUSLY (palms, backs, and in between fingers), then heavily grease the counter you will be using (granite works, but any smooth surface will work) a and dump the bowl of marshmallow/sugar mixture in the middle. Start kneading like you would bread dough. You will immediately see why you have greased your hands. Keep kneading, this stuff is sticky at this stage! Add the rest of the powdered sugar and knead some more. Re-grease your hands and counter when the fondant starts sticking. If the mix is tearing easily, it is to dry, so add a water (about 1/2 tablespoon at a time and then knead it in). It usually takes me about 8 minutes to get a firm smooth elastic ball so that it will stretch without tearing when you apply it to the cake. It is best if you can let it sit, double wrapped, overnight (but you can use it right away if there are no tiny bits of dry powdered sugar). If you do see them, you will need to knead and maybe add a few more drops of water. Prepare the fondant icing for storing by coating it with a good layer of Crisco shortening, wrap in a plastic-type wrap product and then put it in a resealable or Ziploc bag. Squeeze out as much air as possible. When ready to use, roll out to desired thickness. Adding water or powdered sugar to firm up or loosen as needed. It should be soft, smooth and supple, but firm enough to be lifted onto a cake without tearing. Marshmallow Fondant will hold for weeks. So, make it ahead to save time later.
1 week-4 days in advance
- Make fondant
- Make Robin Hood
To make Robin Hood leaping out of the burning castle I used

- tracing paper
- computer with DVD drive
- colored pencils
- clear packaging tape
- thin flexible wire or heavy fishing line
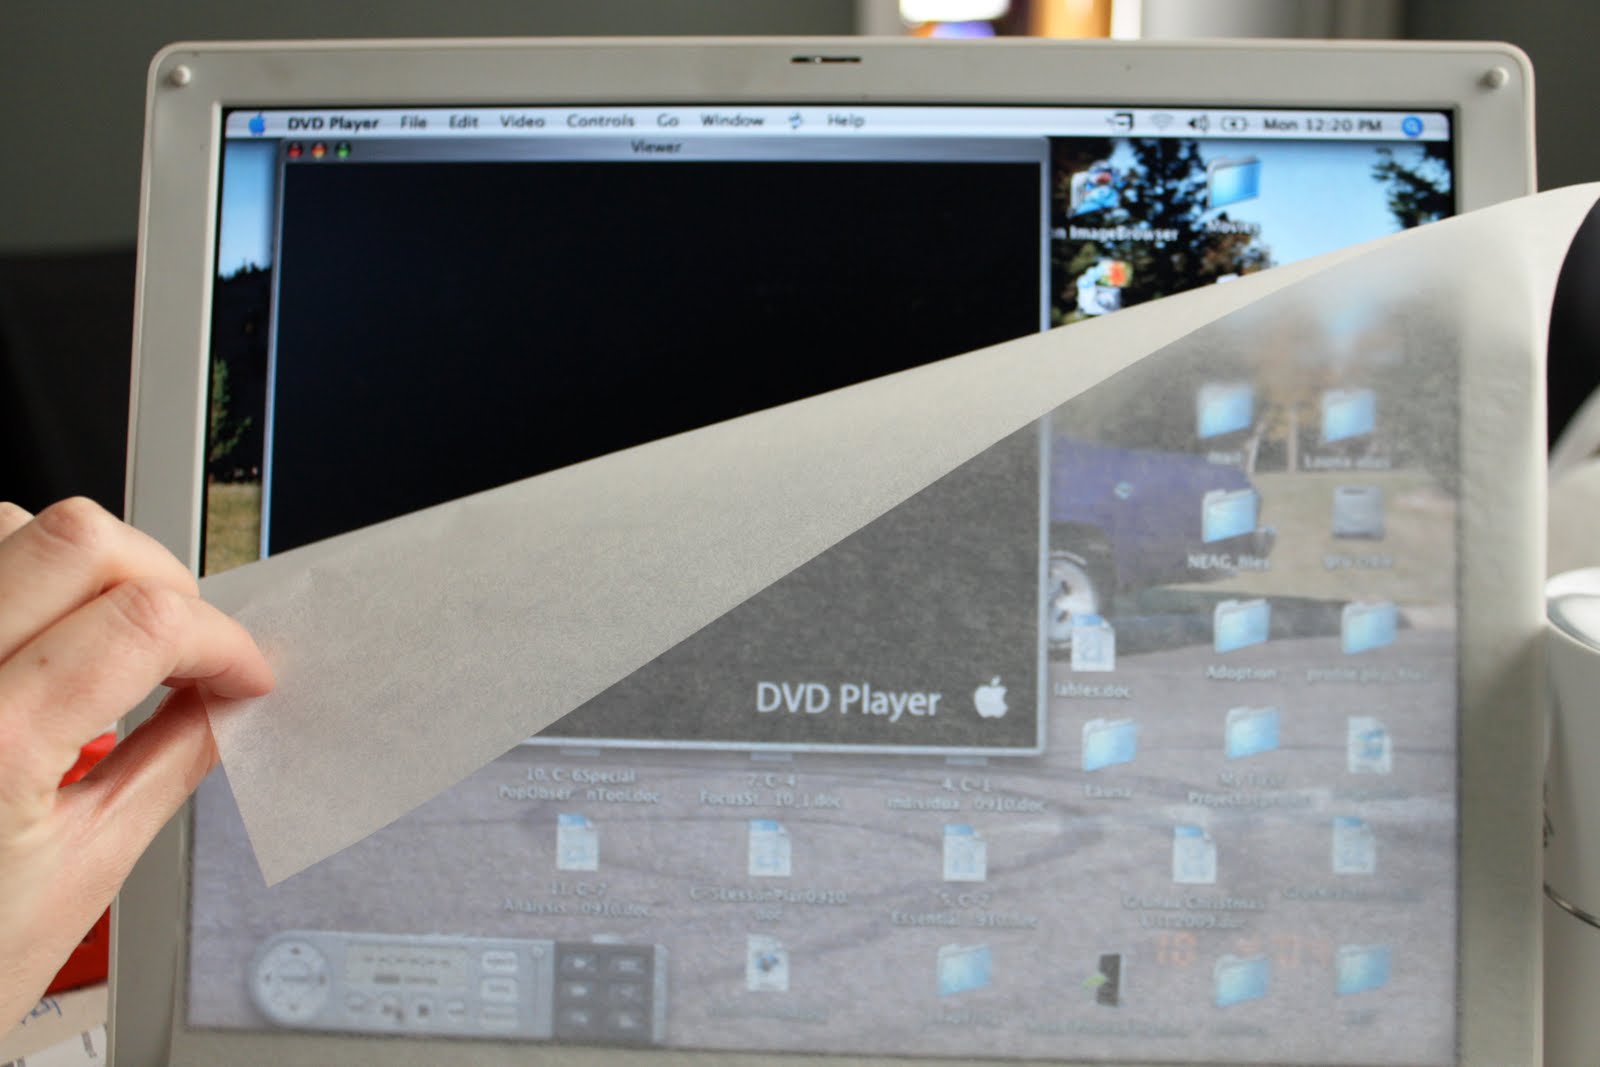 Insert the DVD into the drive and fast forward to the end of the movie when Robin hood jumps from the castle. Pause on the frame you like best and resize the DVD viewer until Robin is the right size for the cake. Place the tracing paper over the screen and gently trace. Remove the paper and color in the outline with colored pencils.

Carefully cut out the drawing and lay it on a sheet of plain printer paper or card stock. Lay a piece of tape over the drawing and press firmly.
Place the other piece on the backside of the plain paper to seal it. Again cut out the drawing very carefully, a craft knife can be very helpful for all the details.


Secure a piece of thin wire or fishing line to Robin Hood with hot glue.
3 days in advance
Roll out 50 square inches of fondant to 1/8 inch thick and color dark brown, using black and brown color gel. Dust the surface with powdered sugar to keep it from sticking and to firm up. The brown needs to be stiffer than the rest of the fondant.


Re-roll brown to 1/8 inch think. Take a party hat and trim the bottom to a 3 inch diameter and roughly 4 inches tall.
Unroll the party hat and trace onto the fondant.
Cut out and form around the party hat, sealing the edges. With a small paring knife, cut holes for candles.* Set aside, uncovered and let harden.  Roll out remaining brown fondant and cut a straight edge. Using the large end of a cake decorating tip like a cookie cutter, cut out half circles. Continue cutting straight edges and shingles. Store shingles in a air tight container to keep soft.
Roll out remaining brown fondant and cut a straight edge. Using the large end of a cake decorating tip like a cookie cutter, cut out half circles. Continue cutting straight edges and shingles. Store shingles in a air tight container to keep soft.*I originally planned to use red, orange, and yellow tissue paper and made the holes rather large. But when I changed my mind and decided to use candles I had to re-size the openings by partially covering them with the shingles. I would not recommend making more than 8 or 10 candle openings because it would weaken the turret structure.
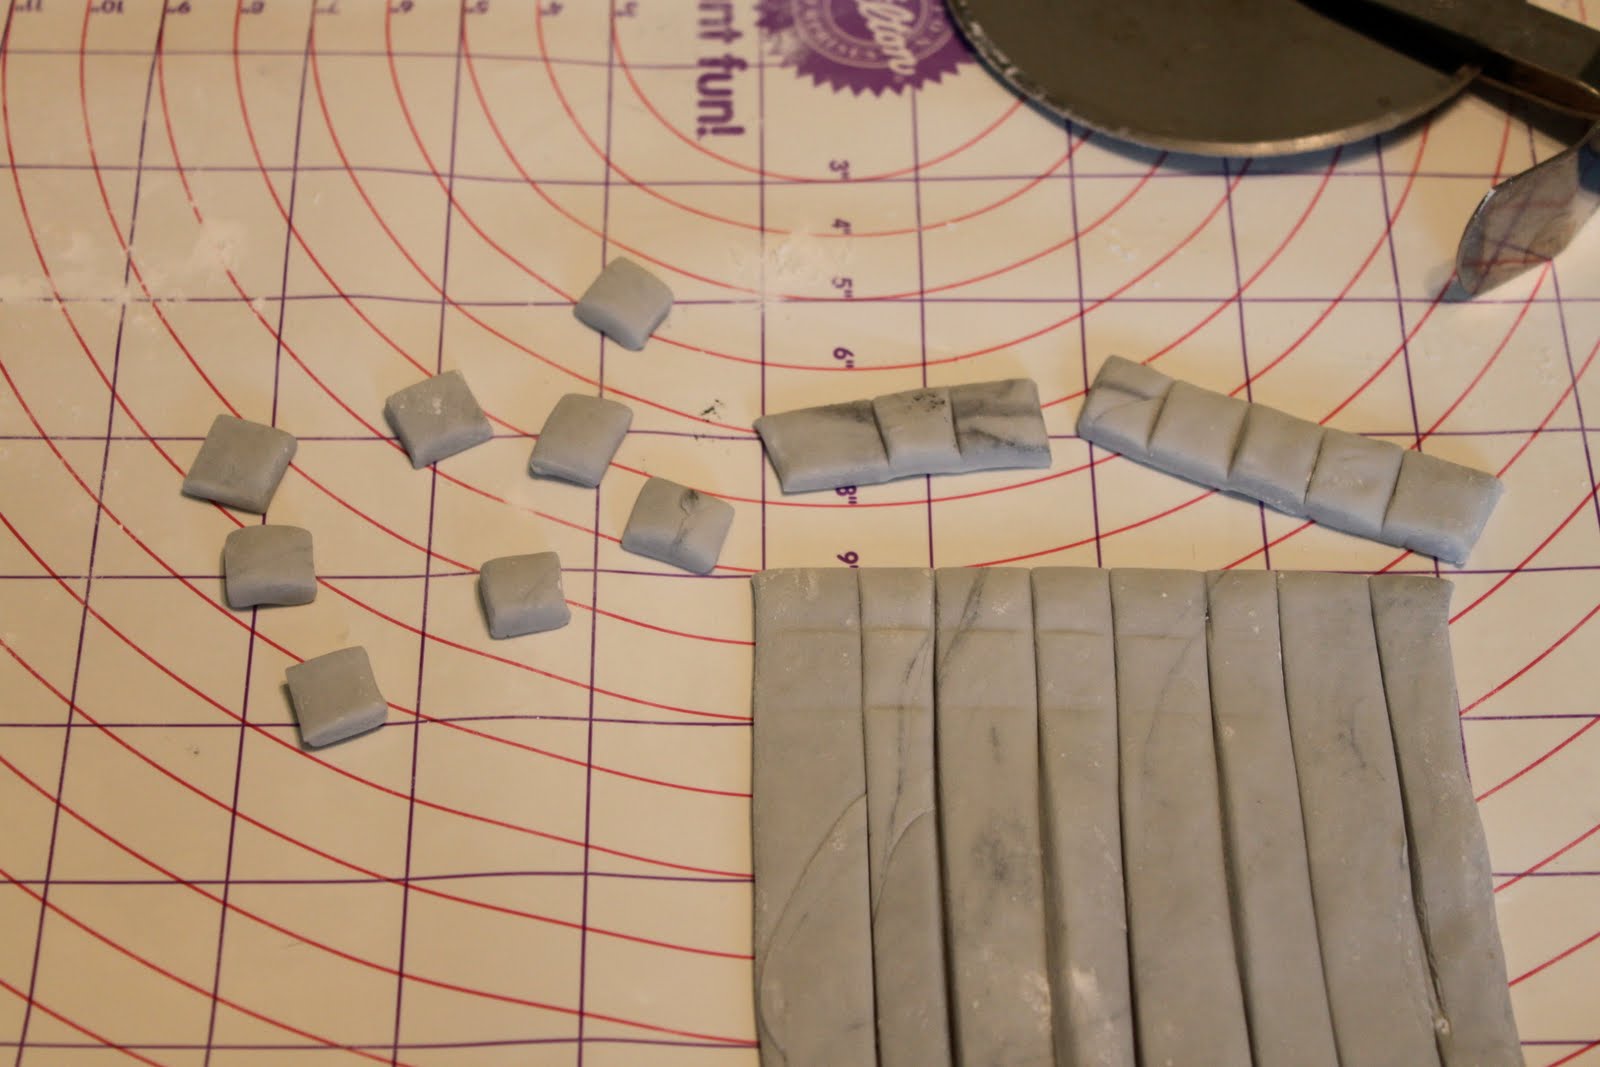
 Roll out 300 square inches of fondant in batches and tint with black food coloring. Do not completely blend the color in, leaving it streaked and mottled for a natural stone look. Roll fondant to 1/4 inch thick and using a ruler or other straight edge and a pizza wheel or knife cut into 1 inch squares. Reserve 25 squares and cut each into (4) 1/2 inch squares. Dust squares with powdered sugar and store in air tight containers or Ziploc bags.
2 days in advance
Bake cakes following Wilton's guide. I used 6 boxed mixes which make about 4 1/2 cups of batter each. After the cakes have cooled, level the tops and use the diagram below to carve the cakes into pieces.


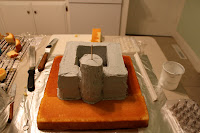
Take your foil-wrapped piece of card board and center the pieces for layer 1. Tint 4 cups of butter cream frosting gray and frost a 9 inch square centered left to right on the 11x15 cake with one edge at the joint between the 2 cakes.
Add the pieces for layer 2 on the square, frost. Repeat with each layer.
Add the pieces for layer 2 on the square, frost. Repeat with each layer.


Reinforce the tower with a kitchen skewer. Tint 1/2-3/4 cup
of frosting blue and frost the moat, bringing it out farther in the front.


Starting with the 1/2 inch stones, lay them side by side in a row at the back of the castle. Use the traditional stretcher bond technique starting the next line with a half stone so that the grout lines from the row above run into the center of the stone below.

Then using the 1 inch stones in the same manner, cover the insides of the castle walls then the top surfaces.  Using a toochpick mark out the shape of the drawbridge/doorway on the front of the turret and continue the stonework around the marks covering the entire surface. Lay squares along the top ridge and continue working from the top of the side walls to the bottom. Maintaining the simple stretcher bond pattern. If the butter cream dries and the stones will not adhere use a small amount of piping gel to moisten. Cover the cake loosely with plastic wrap.
 Using a toochpick mark out the shape of the drawbridge/doorway on the front of the turret and continue the stonework around the marks covering the entire surface. Lay squares along the top ridge and continue working from the top of the side walls to the bottom. Maintaining the simple stretcher bond pattern. If the butter cream dries and the stones will not adhere use a small amount of piping gel to moisten. Cover the cake loosely with plastic wrap.
 Use piping gel to adhere the shingles to the roof. Start at the bottom and layer upwards.
 Be very careful as the roof is brittle when its dried. If it breaks add a few drops of water and press the pieces back together. Let the roof dry uncovered until the cake is served.


1 day in advance
 Color a small amount of fondant black and shape into a doorway that is 1 x 2 inches with a rounded top. Cut a graham cracker the same shape as the doorway, but slightly shorter, using a small paring knife and a sawing motion.

Place the doorway on the turret. Roll more gray fondant into small balls to finish the doorway.
Tint the remaining 4 1/2 cups of frosting green and apply a thin layer to the remaining exposed cake. Place the rest in a pastry bag fitted with a with a coupler and number 233 tip and set aside.


Color 1/4-1/3 cup of piping gel blue and cover the blue frosting.
Wrap 2 toothpicks with foil. Place the graham cracker over the moat water and lean the toothpicks between the drawbridge and the doorway.

Wrap 2 toothpicks with foil. Place the graham cracker over the moat water and lean the toothpicks between the drawbridge and the doorway.

Cut out 16, thick, 1x1 inch squares. Roll 4 a 1/2 inch wider and bend, as shown, for the corners. Secure thick squares and with toothpicks, starting at the turret and working your way around leaving spaces in between.


Use a grass tip to cover the thin layer of green frosting; squeeze, pull back and release.

Take a ball of fondant and roll it into a cylinder. Slide it onto the skewer to make a post. Cover the cake overnight.
Day of
Place the turret on top and side candles into the openings, gently pushing them into the fondant post.


Attach Robin Hood by sticking the other end of the wire or line in through the top of the turret and into the fondant post.
Place the turret on top and side candles into the openings, gently pushing them into the fondant post.


Attach Robin Hood by sticking the other end of the wire or line in through the top of the turret and into the fondant post.
My favorite part of the whole cake was the fact that we actually it it on fire. As I said before I had originally planned to use tissue paper, but this was was so much more fun. And considering the first thing Levi asked when he saw his cake was if we could light it on fire, I knew I made the right choice.


