Search This Blog

Tuesday, April 20, 2010

How-To: Robin Hood Birthday Cake

11/52

Here it is! The much-anticipated cake blog! This cake, like some of my cooking, was something I just made up. So, again, I learned as I was going and some of my pictures don't quite match my directions. And while it looks difficult, it really isn't. Time consuming? Yes. Difficult? No. If you can roll and cut out Play-dough, you can make this cake.

One great thing about this cake is that it can be made in stages and spread out over a week. Here are the things you will need to make this cake.


I have never been a big fan of fondant. Yeah, its neat and pretty looking, but it tastes like crap. Most people, including myself, just peel the fondant off to get to the butter cream frosting underneath. And who wants to to all that work for no one to even eat it? Not me. But I was willing to use it just for the stone work on the castle purely for the smooth look of the stone. So you can imagine how happy I was when a friend told me about Marshmallow Fondant! (Thanks Janna!) Not only is the recipe cheap and easy, it tastes fantastic! So much so, that I had to stop myself from eating it so I would have enough. Here is Janna's recipe:

Marshmallow Fondant
  • 16 ounces white mini-marshmallows (use a good quality brand)
  • 2 to 5 tablespoons water
  • 2 pounds powdered sugar
  • 1/2 cup shortening (you will be digging into it so place in a very easily accessed bowl)

NOTE: Please be careful, this first stage can get hot. Melt marshmallows and 2 tablespoons of water in a microwave bowl. Put the bowl in the microwave for 30 seconds, open microwave and stir, back in microwave for 30 seconds more, open microwave and stir again, and continue doing this until melted. It usually takes about 2 1/2 minutes total. Place 3/4 of the powdered sugar on the top of the melted marshmallow mix and gently stir a few times with a well-greased, rubber spatula. Now grease your hands GENEROUSLY (palms, backs, and in between fingers), then heavily grease the counter you will be using (granite works, but any smooth surface will work) a and dump the bowl of marshmallow/sugar mixture in the middle. Start kneading like you would bread dough. You will immediately see why you have greased your hands. Keep kneading, this stuff is sticky at this stage! Add the rest of the powdered sugar and knead some more. Re-grease your hands and counter when the fondant starts sticking. If the mix is tearing easily, it is to dry, so add a water (about 1/2 tablespoon at a time and then knead it in). It usually takes me about 8 minutes to get a firm smooth elastic ball so that it will stretch without tearing when you apply it to the cake. It is best if you can let it sit, double wrapped, overnight (but you can use it right away if there are no tiny bits of dry powdered sugar). If you do see them, you will need to knead and maybe add a few more drops of water. Prepare the fondant icing for storing by coating it with a good layer of Crisco shortening, wrap in a plastic-type wrap product and then put it in a resealable or Ziploc bag. Squeeze out as much air as possible. When ready to use, roll out to desired thickness. Adding water or powdered sugar to firm up or loosen as needed. It should be soft, smooth and supple, but firm enough to be lifted onto a cake without tearing. Marshmallow Fondant will hold for weeks. So, make it ahead to save time later.

1 week-4 days in advance
  • Make fondant
  • Make Robin Hood

To make Robin Hood leaping out of the burning castle I used


  • tracing paper
  • computer with DVD drive
  • colored pencils
  • clear packaging tape
  • thin flexible wire or heavy fishing line
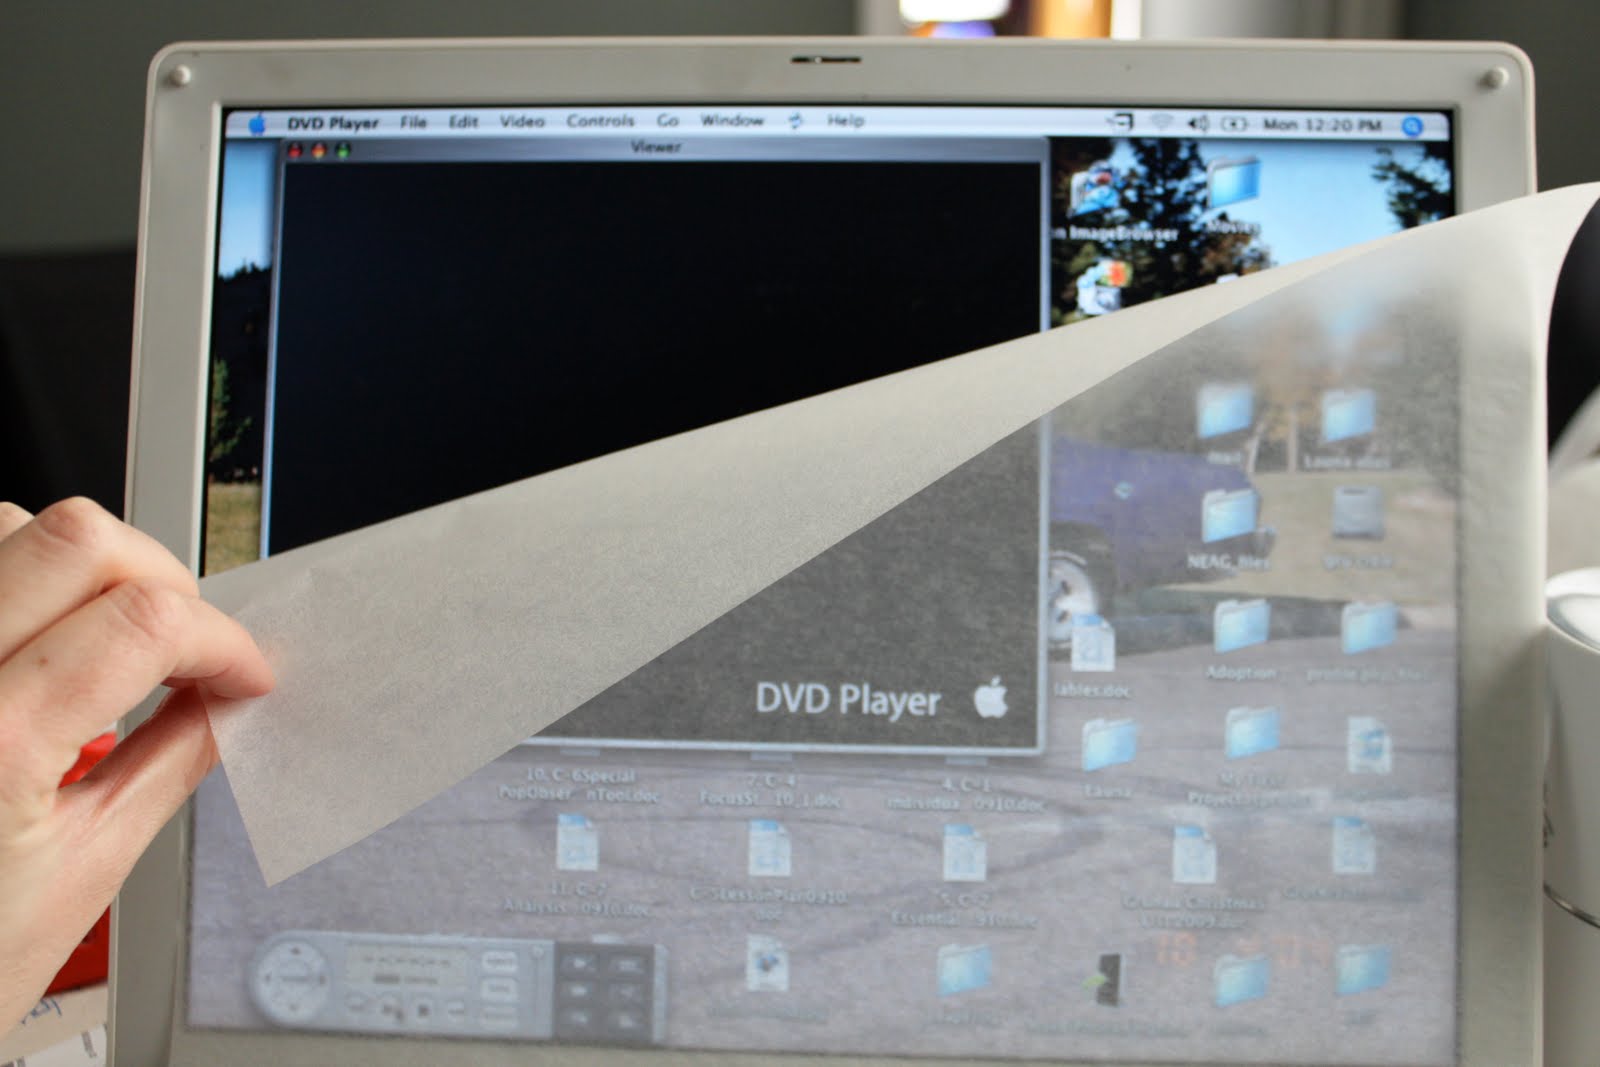
(This part can be made well in advance, but of course I waited until the morning of.

Insert the DVD into the drive and fast forward to the end of the movie when Robin hood jumps from the castle. Pause on the frame you like best and resize the DVD viewer until Robin is the right size for the cake. Place the tracing paper over the screen and gently trace. Remove the paper and color in the outline with colored pencils.


Carefully cut out the drawing and lay it on a sheet of plain printer paper or card stock. Lay a piece of tape over the drawing and press firmly.


Place the other piece on the backside of the plain paper to seal it. Again cut out the drawing very carefully, a craft knife can be very helpful for all the details.


Secure a piece of thin wire or fishing line to Robin Hood with hot glue.


3 days in advance

Roll out 50 square inches of fondant to 1/8 inch thick and color dark brown, using black and brown color gel. Dust the surface with powdered sugar to keep it from sticking and to firm up. The brown needs to be stiffer than the rest of the fondant.


Re-roll brown to 1/8 inch think. Take a party hat and trim the bottom to a 3 inch diameter and roughly 4 inches tall.
Unroll the party hat and trace onto the fondant.
Cut out and form around the party hat, sealing the edges. With a small paring knife, cut holes for candles.* Set aside, uncovered and let harden. Roll out remaining brown fondant and cut a straight edge. Using the large end of a cake decorating tip like a cookie cutter, cut out half circles. Continue cutting straight edges and shingles. Store shingles in a air tight container to keep soft.


*I originally planned to use red, orange, and yellow tissue paper and made the holes rather large. But when I changed my mind and decided to use candles I had to re-size the openings by partially covering them with the shingles. I would not recommend making more than 8 or 10 candle openings because it would weaken the turret structure.

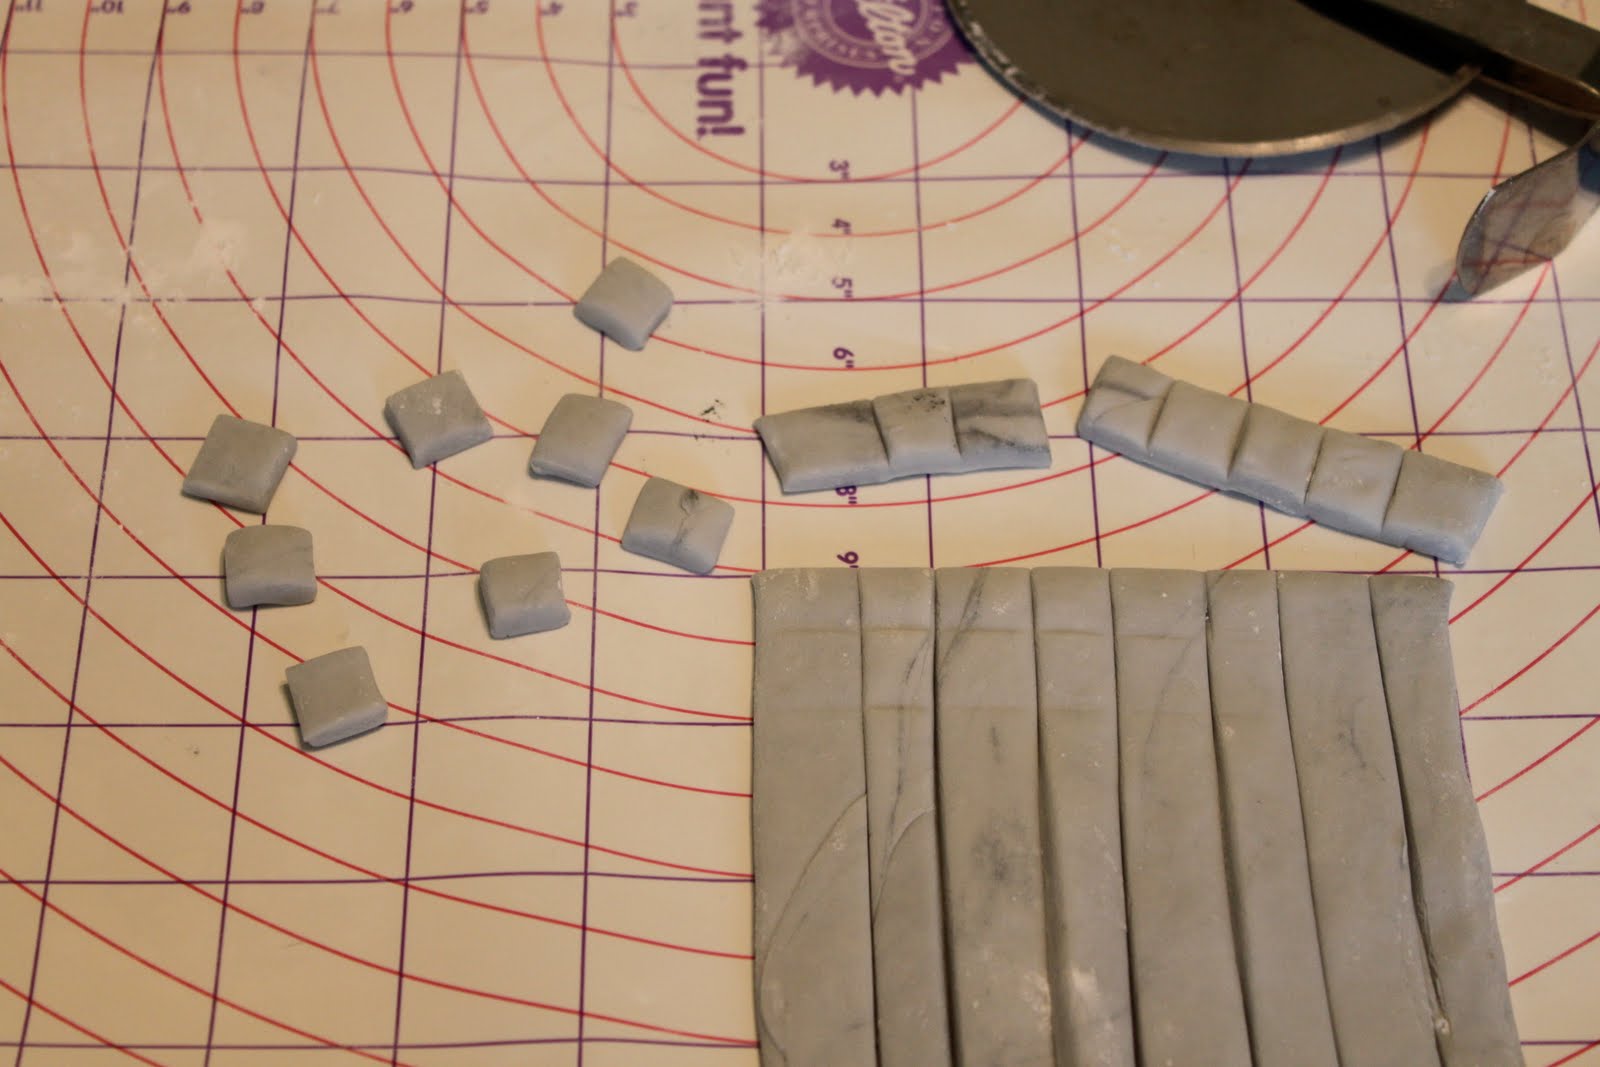
Roll out 300 square inches of fondant in batches and tint with black food coloring. Do not completely blend the color in, leaving it streaked and mottled for a natural stone look. Roll fondant to 1/4 inch thick and using a ruler or other straight edge and a pizza wheel or knife cut into 1 inch squares. Reserve 25 squares and cut each into (4) 1/2 inch squares. Dust squares with powdered sugar and store in air tight containers or Ziploc bags.


2 days in advance

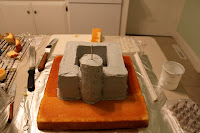
Bake cakes following Wilton's guide. I used 6 boxed mixes which make about 4 1/2 cups of batter each. After the cakes have cooled, level the tops and use the diagram below to carve the cakes into pieces.




Take your foil-wrapped piece of card board and center the pieces for layer 1. Tint 4 cups of butter cream frosting gray and frost a 9 inch square centered left to right on the 11x15 cake with one edge at the joint between the 2 cakes.


Add the pieces for layer 2 on the square, frost. Repeat with each layer.


Reinforce the tower with a kitchen skewer. Tint 1/2-3/4 cup
of frosting blue and frost the moat, bringing it out farther in the front.


Starting with the 1/2 inch stones, lay them side by side in a row at the back of the castle. Use the traditional stretcher bond technique starting the next line with a half stone so that the grout lines from the row above run into the center of the stone below.


Then using the 1 inch stones in the same manner, cover the insides of the castle walls then the top surfaces. Using a toochpick mark out the shape of the drawbridge/doorway on the front of the turret and continue the stonework around the marks covering the entire surface. Lay squares along the top ridge and continue working from the top of the side walls to the bottom. Maintaining the simple stretcher bond pattern. If the butter cream dries and the stones will not adhere use a small amount of piping gel to moisten. Cover the cake loosely with plastic wrap.


Use piping gel to adhere the shingles to the roof. Start at the bottom and layer upwards.


Be very careful as the roof is brittle when its dried. If it breaks add a few drops of water and press the pieces back together. Let the roof dry uncovered until the cake is served.


1 day in advance

Color a small amount of fondant black and shape into a doorway that is 1 x 2 inches with a rounded top. Cut a graham cracker the same shape as the doorway, but slightly shorter, using a small paring knife and a sawing motion.


Place the doorway on the turret. Roll more gray fondant into small balls to finish the doorway.


Tint the remaining 4 1/2 cups of frosting green and apply a thin layer to the remaining exposed cake. Place the rest in a pastry bag fitted with a with a coupler and number 233 tip and set aside.


Color 1/4-1/3 cup of piping gel blue and cover the blue frosting.
Wrap 2 toothpicks with foil. Place the graham cracker over the moat water and lean the toothpicks between the drawbridge and the doorway.


Cut out 16, thick, 1x1 inch squares. Roll 4 a 1/2 inch wider and bend, as shown, for the corners. Secure thick squares and with toothpicks, starting at the turret and working your way around leaving spaces in between.


Use a grass tip to cover the thin layer of green frosting; squeeze, pull back and release.


Take a ball of fondant and roll it into a cylinder. Slide it onto the skewer to make a post. Cover the cake overnight.


Day of

Place the turret on top and side candles into the openings, gently pushing them into the fondant post.
Attach Robin Hood by sticking the other end of the wire or line in through the top of the turret and into the fondant post.


My favorite part of the whole cake was the fact that we actually it it on fire. As I said before I had originally planned to use tissue paper, but this was was so much more fun. And considering the first thing Levi asked when he saw his cake was if we could light it on fire, I knew I made the right choice.


Monday, March 29, 2010

Beautiful Blue

10/52

Its spring time around our house. I know this not because there are birds chirping outside my windows or my roses are blooming, not because of the amazing weather we are enjoying or even because of my freckled shoulders. I know this because there is a brooding animosity in my home. It starts out as a few snide comments and curt retorts. Soon there will be rolling of eyes and scoffing grunts, criticizing, mocking and bragging are to follow. And it is the same every year in the Grunau household. Ladies and gentlemen, it is baseball season.

This year the battle of beautiful Dodger blue and pukey Giant orange started off with an innocent child hurt in the wake. A few weeks ago Jeff was helping me get the kids ready to go to a doctor appointment and I was about to thank him for dressing Autumn when I noticed she was wearing a heavy sweatsuit. It was supposed to be in the mid 70's that day and I knew she would be miserable.

"Honey, its going to be way to warm for her to wear that."
"It's ok, I put something underneath it."

I could hear the mischievous smile in his voice. I glared at him across the room. He looked up and grinned with false innocence and walked her to the van. I shuddered to think about the hideousness that lay beneath that warm sweatsuit. I quickly ran back upstairs and pulled a beautiful sun dress from her closet and stashed it in her backpack. When we arrived at the doctor's office Mila had to go potty and I had to feed Autumn. As soon as Jeff and Mila disappeared around the corner I knew this was my chance. I gagged as I removed the sweatsuit. There it was, vile and wretched. A pink and purple Giants body suit.

"Oh, Baby Girl, what did your daddy do to you? You poor thing! Come here and let me take this nasty thing off of you!"

She looked refreshed and happy in her white sundress. Jeff and Mila came back just then.

"Where did that outfit come from?" he smiled with irritation.
"From her backpack? Why?" I smiled back.
"What was wrong with what she was wearing?"
"My daughter is not wearing that thing in public"

Mila was called back and so we dropped it. Nearing the end of the appointment Jeff, Levi and Autumn hung out in the waiting area while Mila took her eye test. When Jeff came in holding Autumn at arms distance I knew there was trouble. He grabbed her back pack and headed out. We finished a few minutes later and I found him back in the waiting room with the contents of her bag strewn about. And her poop-stained clothes in a pile next to her.

"Where are her wipes?!"
"Oops! They are in the van. You head down and I'll make the follow-up appointment."

When I joined them a few minutes later Autumn was again suffering in her daddy-picked clothes.

"See, Hun? She made her choice!"
"Eewe!!!"

I sighed, embarrassed for my baby. It's a good thing Jeff had his own doctor appointment to go to and we had some time to kill before Mila's field trip. As Jeff drove away I smiled to myself and headed straight for Target. Soon enough autumn had a beautiful, new, blue dress on and a few seconds later she spit up on it. No problem, I had the perfect spit up rag.

Thursday, March 18, 2010

How-To: Robin Hood Birthday Party

9/52

This year my son, Levi, turned 5. And since we don’t do birthday parties every year (this is only his second party, ever) I wanted to do something fun, and creative that he and his friends would remember. Since Disney’s Robin Hood is one of his favorite movies and it is boy and girl friendly, I knew it would be perfect. I’ll share the things I did and give other ideas to make it work for older kids, scaled down or scaled up. Feel free to add comments if you come up with things to add!

Invitations
I love to use e-vite. It’s free and I can customize them to whatever I want. I searched the Internet for a Robin Hood image and found the one above. I added that to the e-vite and wrote a message to match: Then I customized the responses with quotes from the movie. For Yes replies it read “A perfect bull’s-eye”, for Maybe it said, “Maybe it’ll even be a double hangin’” and for No it was “It’s so miserably unfair!”. Afterward I thought of another quote to use for yes replies, "Coming...coming!" Our guests even responded in the same manner with mentions of Sir Hiss and a condition of attendance based on a tax cut. If you are into paper crafting you could make a bull’s-eye out of red and white paper with all the party information on the reverse side. If you make it the size of a CD you can use CD sleeves as envelopes and tuck in a few paper arrows too.

Crafts
For all the craft items I tried to use things I (or my parents) already had, were cheap, easy to find and uncomplicated. Also being frugal, I started purchasing items a few months in advance using my weekly Jo-Ann’s and Michael’s coupons. I won’t say you already have all these things (even though you might) because I hate it when shows say…”Using only things you already have…” and I think “Great!” until I realize that I have none of those items. Like the time Rachel Ray made a meal from pantry staples which included a can of anchovies… Really? Anchovies are a staple? Anyway… All of the crafts are simple. If you can cut, glue and sew a straight line (or know someone who can) you can make these fun party hats and favors.


Hats

Robin Hood
  • Green felt
  • Craft Feathers
  • Hot Glue
  • Green Thread
I searched high and low on the Internet for a Robin Hood hat pattern and found a few. One was in metric and the other had incorrect measurements (good thing I tried it with newspaper first!), so I created my own pattern on a 12x12 piece of card stock. You can use newspaper too. Adjust the pattern proportionally for bigger kids, and make a sample with newspaper to make sure it’s the right size. For our size pattern, we needed a 12x24 inch rectangle of green craft felt*.

Fold the rectangle into a 12x12 square (right sides together, although it doesn’t really matter with felt), Place the pattern on the felt, aligning the folds. Trace or pin the pattern and cut out. Stitch along the two sides as shown. Turn it right side out and tuck a feather in one side. Glue a scrap of felt to the underside to secure the feather. Turn edges up as shown.

Using my coupons I was able to get 1 1/3 yards of 72” wide fabric (enough for 12 hats) for less than $5 and feathers for less than $2. *Use the 12x24 measurement when estimating the amount of fabric to buy, but just fold the fabric with enough room to place the pattern and cut. Cutting out rectangles and then the hats just doubles your work (Thank you Mom, for saving me from doing that!)


Maid Marian
  • Pink felt
  • Assorted curling ribbon
  • Pink thread
  • Glitter (optional)
  • Small, wooden, kitchen skewers (optional)
  • Satin ribbon, thin (optional)
All the online patterns I saw for this medieval style hat involved tons of sewing that I wasn’t equipped or in the mood to do. So, I just made this one up. In hindsight I wish I would have done things a little differently. My directions will include things I didn’t do, and therefore aren’t in the pictures. Cut a large half circle out of newspaper. Fold it to make a cone with the circumference and height you want. Allow for a ½ inch seam and trim the top off the point as shown. Cut the newspaper to make your pattern. Take your pattern with you to the store and lay it out on the felt, counting out as many as you need and measuring accordingly. To save cutting time, fold both you pattern and fabric, align folds, and cut. Count out 12-15 pieces of curling ribbon, cut to 30 inches when pulled straight. I used, white, purple, light and dark pink ribbon. Tie a knot at the top of the bundle, do not curl. Lay fabric open right side facing up, lay ribbons along the middle with the knot at the top. Fold fabric, closing the ribbons inside.

Stitch a ½ inch seam, sewing through the ribbons to prevent them from falling out, stitch a second seam, ¼ inch. Turn right side out. Slide a kitchen skewer (trimmed if needed) in between the two seams for extra support*.

Attach 12 inches of satin ribbon with hot glue to each side for tying under the chin, keeping the seam in the back. Apply a super-fine glitter with a dry, coarse craft or paintbrush, the felt will trap the glitter very well and it won’t transfer off much at all. Or, if you can find it, buy glitter felt. I found it in other colors, but not pink. I used an iridescent embossing powder/glitter my mom found in her craft box. If you can’t find glitter felt or have any glitter to use, fore go this step. Again with my coupon I made 12 hats for less than $5.

*I figured out that I could sew through the ribbon on the last hat I made, and I highly recommend doing it that way after we had a few ribbon bundles fall out at the party. Also, I had planned to glue skewers to the inside of the hat, but it was too tricky. I hadn’t allowed for the ½ inch seam, so I just left them with out anything for support, and while they stood up fine on their own, once the girls were wearing them and running around, they tended to flop over.


Rings

  • Small plastic rings
  • Fabric embellishments or silk flowers
  • Rhinestones
  • Hot glue


Go to a party supply place and look through their party favor bins. I found small rings for $.15 each, or $1.50 for a dozen. Even though these rings already had a charm on top (hearts, happy faces, etc.) some had already fallen off. So, I dug through the bin and pulled out those with missing pieces. Find the smallest flowers you can at a craft store. I used fabric embellishments. They were the perfect size, prettier and more durable than plain silk. They were more expensive though. I got them for around $6, but you could easily use a $.50 bunch of silks. Hot glue together petal layers if you choose then glue to the ring. My flowers already had centers on them, but if you use silks you can use rhinestones to seal the center.


Favors
  • Brown or tan fabric
  • Brown or tan thread
  • Embroidery thread
  • Tags
  • Marker or printer
  • Chocolate coins
You can use any type of scrap fabric for this. I found a piece of tan felt in the remnant bin for $1. Cut the fabric into 4x5 rectangles. Place two rectangles, right sides together and stitch on three sides with a ¼ inch seam, leaving a 4 inch edge open. You can round the bottom if you choose. Trim corners and turn right side out. Using a large craft needle, weave a 10 inch length of embroidery thread in and out 1/3 of the way down the bag to make a draw string. Fill bag with chocolate coins, we used 5, that being the birthday boy’s age and all. I borrowed a friend’s cri-cut machine to make the tags and hand wrote Thank You on one side and Farthings on the other. I wish I would have used my computer to print them with a nice calligraphy or Old English style writing and then cut tags. My handwriting is terrible. Either way, attach a farthing/thank you tag to each bag and tie a bow.


Games

  • Shuttlecocks
  • Badminton rackets
  • Bows and Arrows (optional)
Since most of the kids at this party were fairly young I ruled out having an archery tournament or organized badminton game. Although that would have been fun, I kept seeing them whacking each other with rackets, or someone walking in front of the target and thought it best to avoid those scenarios. Instead we laid down a hula-hoop (a basket would work too) and had the kids try hitting shuttlecocks with rackets into the hoop. While this proved to be more difficult than I thought (not one kid, with six tries each, made it in), it was fun to watch. We marked the driveway with sidewalk chalk and drew lines every two feet and then labeled them 1-10. Each child found their age on the number line and shot form there. 2 feet per year of age for the child evened the paying field a bit, with 5-year-olds being 10 feet away, 6-year-olds being 12 and so on. If you do this for older kids, you could definitely set up an archery area (suction arrows or real, depending on your preference and home owners insurance), play badminton or play a game of tag where the “Honorable Sheriff of Nottingham” has to capture citizens for tax evasion and throw them in jail.

Cake
Now, that is another blog entirely… stay tuned!

Saturday, March 13, 2010

DSL

8/52

Some of you may have been wondering where my latest blog post is. The long and short of it is that it's done (minus some formatting) but I can't post it. "Why, pray tell, is this?" you might be wondering. You know you think in old English. Because, despite living in the middle of a large city, we cannot get DSL Internet. Ok, we can get it, if we sign up for Comcast DSL and cable for $80 per month and a contract. Not happening. Or HughesNet for $60/month plus $300 in equipment. Nice try. Verizon doesn't serve our area, ironically they serve Sanger and AT&T, for some unknown reason, can provide phone service, but not DSL. Supposedly I'm too far from the something or other. I'm still suspicious about that since neighbors a few blocks to the north and east of us can get it. I wonder if everyone in my neighborhood bugged them enough if they would get their act together. Hmmm.... sounds like I need to make up a "Call to Action" flyer. Or maybe I'll just call Mayor Swearengin's office to beg the to pass the all-city Wi-Fi plan. My head hurts.

Until this point we have been able to use the network at the school 2 doors down. And although it was spotty but generally reliable, it is now nearly non-existent. Maybe they wised up to the fact that if they didn't pass code it, people were going to use it. In any case, this problem has prevented me from posting my blog about how to do a Robin Hood themed birthday party because all the pictures are on the computer. Sigh.

There is a light at the end of then tunnel though, I hope. We just signed up for Cricket's 3G wireless network. I'm a little concerned with the speed, but at this point. I'll take what I can get. So, for now, I'll have to be content to blog with my thumbs, wait for Fed-ex to deliver our wireless card and be thankful I have such an amazing phone.